What are the steps to performing a hair transplant?
The simplistic explanation of a hair transplant is taking good strong hair that is “immune” to the effects of the hormone that causes male pattern hair loss from the back and the sides of the head and moving it to the bald region. However, it is an intricate process that requires a well-orchestrated execution of several steps with a skilled team.
A hair transplant procedure can be divided into this sequence of five steps:
-
Aesthetic design and surgical planning
The hair transplant surgeon performs this step which begins with a discussion of the goals and limitations of the procedure. The physician evaluates the patient’s hair characteristics and quality and the extent of the hair loss. Evaluation and consideration of the facial features are critical when rebuilding a hairline to reframe the face. The physician evaluates the donor area for quality and density and determines the best harvesting strategy. The physician must consider many factors when choosing a harvesting strategy, including patient age, the extent of hair loss, and long-term hair restoration goals. The final process in this step is drawing the surgical plan on the scalp.
-
Donor region preparation and graft harvesting
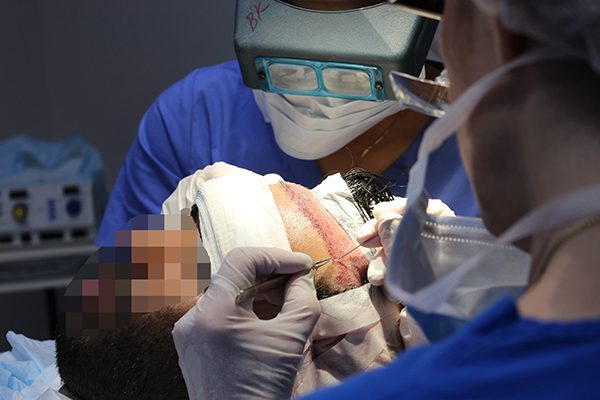
In the procedural room, the scalp is cleaned and prepped. The physician determines the safe donor area’s boundaries and decides from where the follicles are removed. The hair not affected by the hormone that causes male pattern hair loss is located in this safe donor region. The donor harvest site is numbed using local anesthesia injected into the scalp. There are two main hair transplant procedures, the only difference being how the grafts are harvested. The first and most effective is the Follicular Unit Transplant, also known as FUT or the strip procedure. In this procedure, all the grafts needed for transplantation are harvested at once by creating an incision to remove a narrow strip of hair-bearing skin. This area is then closed using staples or sutures. The second harvesting method is the Follicular Unit Excision, or FUE. The physician uses small dermal punch tools to remove individual follicular units one at a time. The circular holes created by the graft removal are left to heal, leaving circular scars.
-
Microscopic graft preparation
All grafts are examined under high-powered microscopes for quality regardless of the harvesting technique. For the FUT procedure, with delicate precision, the hair transplant technicians cut down the narrow strip into the individual follicular units, which naturally occur in groupings of 1 to 4 hairs with the aid of microscopes. Grafts harvested using the FUE technique are already in their individual naturally occurring groups, so they do not need to be cut down further. However, technicians still use microscopes to inspect the grafts for quality and trim excess tissue before implantation.
-
Recipient site preparation and creation
The recipient site is where the harvest and prepped grafts are placed. The recipient site is prepared and anesthetized with local anesthesia. Our clinic uses tiny custom-cut blades that are made to size for each patient’s unique hair follicle size. Using meticulous care, the physician makes the incisions of varying angles and directions using different blade sizes, resulting in a natural look when the hairs grow.
-
Graft implantation
Technicians use fine-tipped forceps to gently grasp each graft and slide them into their pocket incisions made during the recipient site preparation and creation. This final stage of a hair transplant procedure is complete when all the harvested and prepared grafts are placed into their respective “pockets” created by making the incisions in the recipient area.
Post-op instructions are explained and given to the patient, along with a short course of pain medications and antibiotics. The patient goes home to recuperate. If a FUT procedure is performed, the staples or sutures are removed from the donor area in 10 to 14 days.


